Hey world. I had been a very bad blogger lately. Sorry for abandoning you for a long time , readers. Sometimes, it’s easy to get distracted from your first love and I must admit, gardening took a back seat last couple of months. But I am back with a vengeance.
I will be featuring Hydroponics , the cheaper way to do it. I have to thank my friend Karen for allowing me to see how she grows her lettuce and other herbs successfully using Hydroponics. It is simply defined as growing plants without SOIL. You can do this using mineral nutrients and as I have discovered , you can do this in discarded fruit boxes ( the styrofoam ones used to store grapes, apples, oranges),etc.
Last Wednesday, and a good three hour trip from home, I went to see Karen in Orani , Bataan. I just transferred to a new house and Boy do I want to grow my own veggies in a limited space i have in the backyard. The trip was all worth it. I re-discovered my love for gardening. You see , Karen loves to experiment what works best so it saved me a lot of trial and error on this journey.
Materials you will use:
Fruit box, Plastic Screen ,Duct Tape,styropore cups,Plastic( one you use for greenhouse , Screw Driver , and a Milk Can ( to perforate the Perforate the fruit box using milk can( open it , sharpen with a grinder)
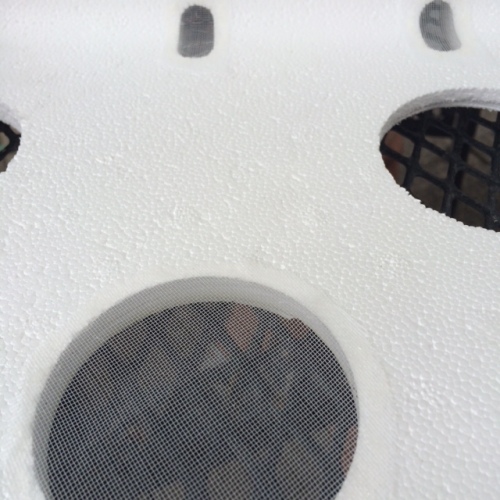
STEP I.Create the holes for the styrofoam cups.The middle ones are for aeration. Do not crowd the rounds so the plants can thrive.

The base of fruit container , being perforated by an empty milk can . Note that the there are six holes. The diameter is enough for a styropore cup to be inside it with only the lip exposed.

STEP 2.Create around 3/4 inch incisions on the bottom of the cup . The trick is to use pointed screw driver to punch holes as markers , finished by a cutter. Do this for the six cups needed.This will allow for the roots to have enough nourishment and water

STEP 3 . PUt screens in the middle round and the sides. This is needed for aeration so you don’t have to provide oxygen for the water.This is probably the most important step you will ever do to ensure survival of your plants.
STEP 4.Put a plastic liner so that water will not seep thru the styrofoam.
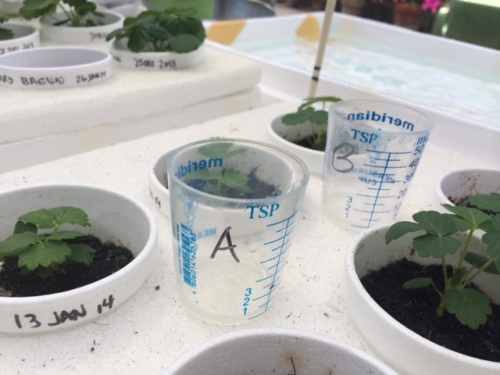
Each cup has a date of germination . Here , you’ll see her Temptation and local Bagiuo strawberries on its 4 week existence.Note also that A and B SNAP( Simple Nutrient Addition Program which is available at HGS ) that is incorporated in the water using a 25 ml equal solution: 10 liter tap water .

The DIY Hydroponic station : using bamboo, fishnets , plastic and your trusty recycled styrofoam fruit boxes. This is natural farming at its best , that uses the most optimal water to grow lettuce and other herbs in a most limited space.


